Inventory
Add an inventory item
How to add a new item to your catalog, give it a starting count, and read the stock, pricing and movement history on its page.
Inventory is your material catalog and your live stock in one place. An item you create here carries its own on-hand count, its cost and sell price, and a history of every movement — across every warehouse, truck and van you keep stock in.
Note — Inventory and Purchasing are a $20/mo add-on to your CRMb plan. If you open Inventory and see a purchase screen instead of your catalog, the add-on isn't on your subscription yet — an owner can add it right from that screen.
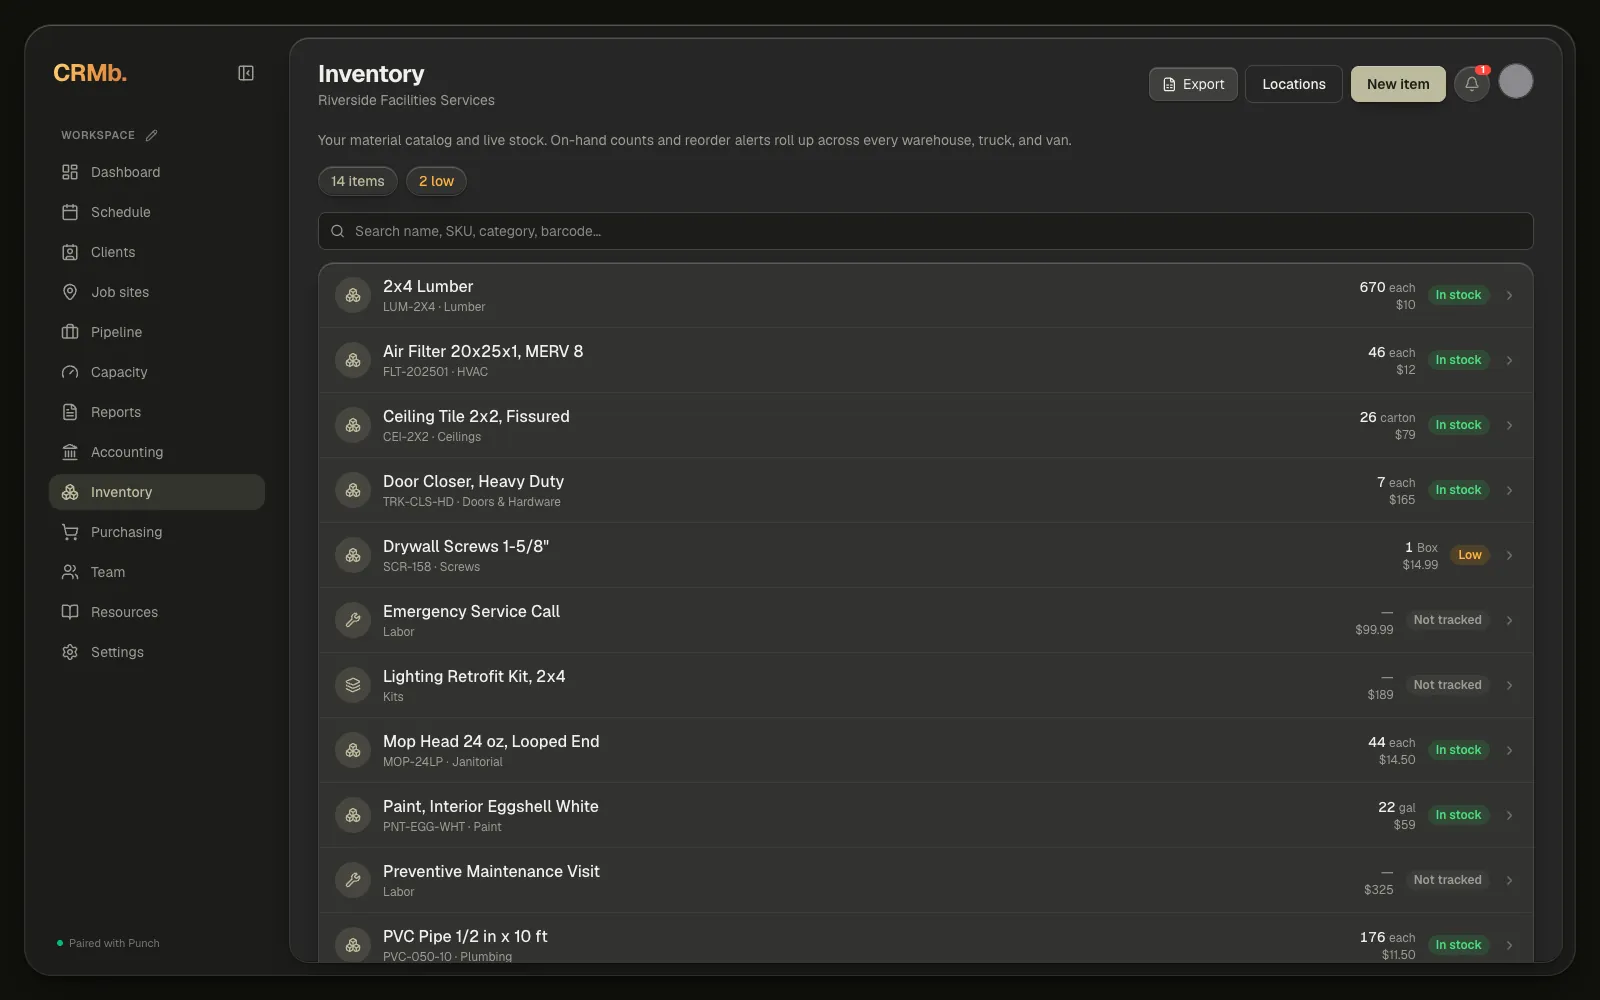
Step 1 — Open Inventory and start a new item
Inventory lives in the left-hand navigation. Look over your current items, then click New item in the top-right corner. New item, Locations and Export are owner and manager controls; everyone else sees the catalog without them.
Step 2 — Choose the item type
At the top of the form are three buttons side by side: Stock, Service, and Assembly. Tap the one that fits — Stock is already selected. Stock is what tells CRMb to keep on-hand counts and reorder alerts for this item.
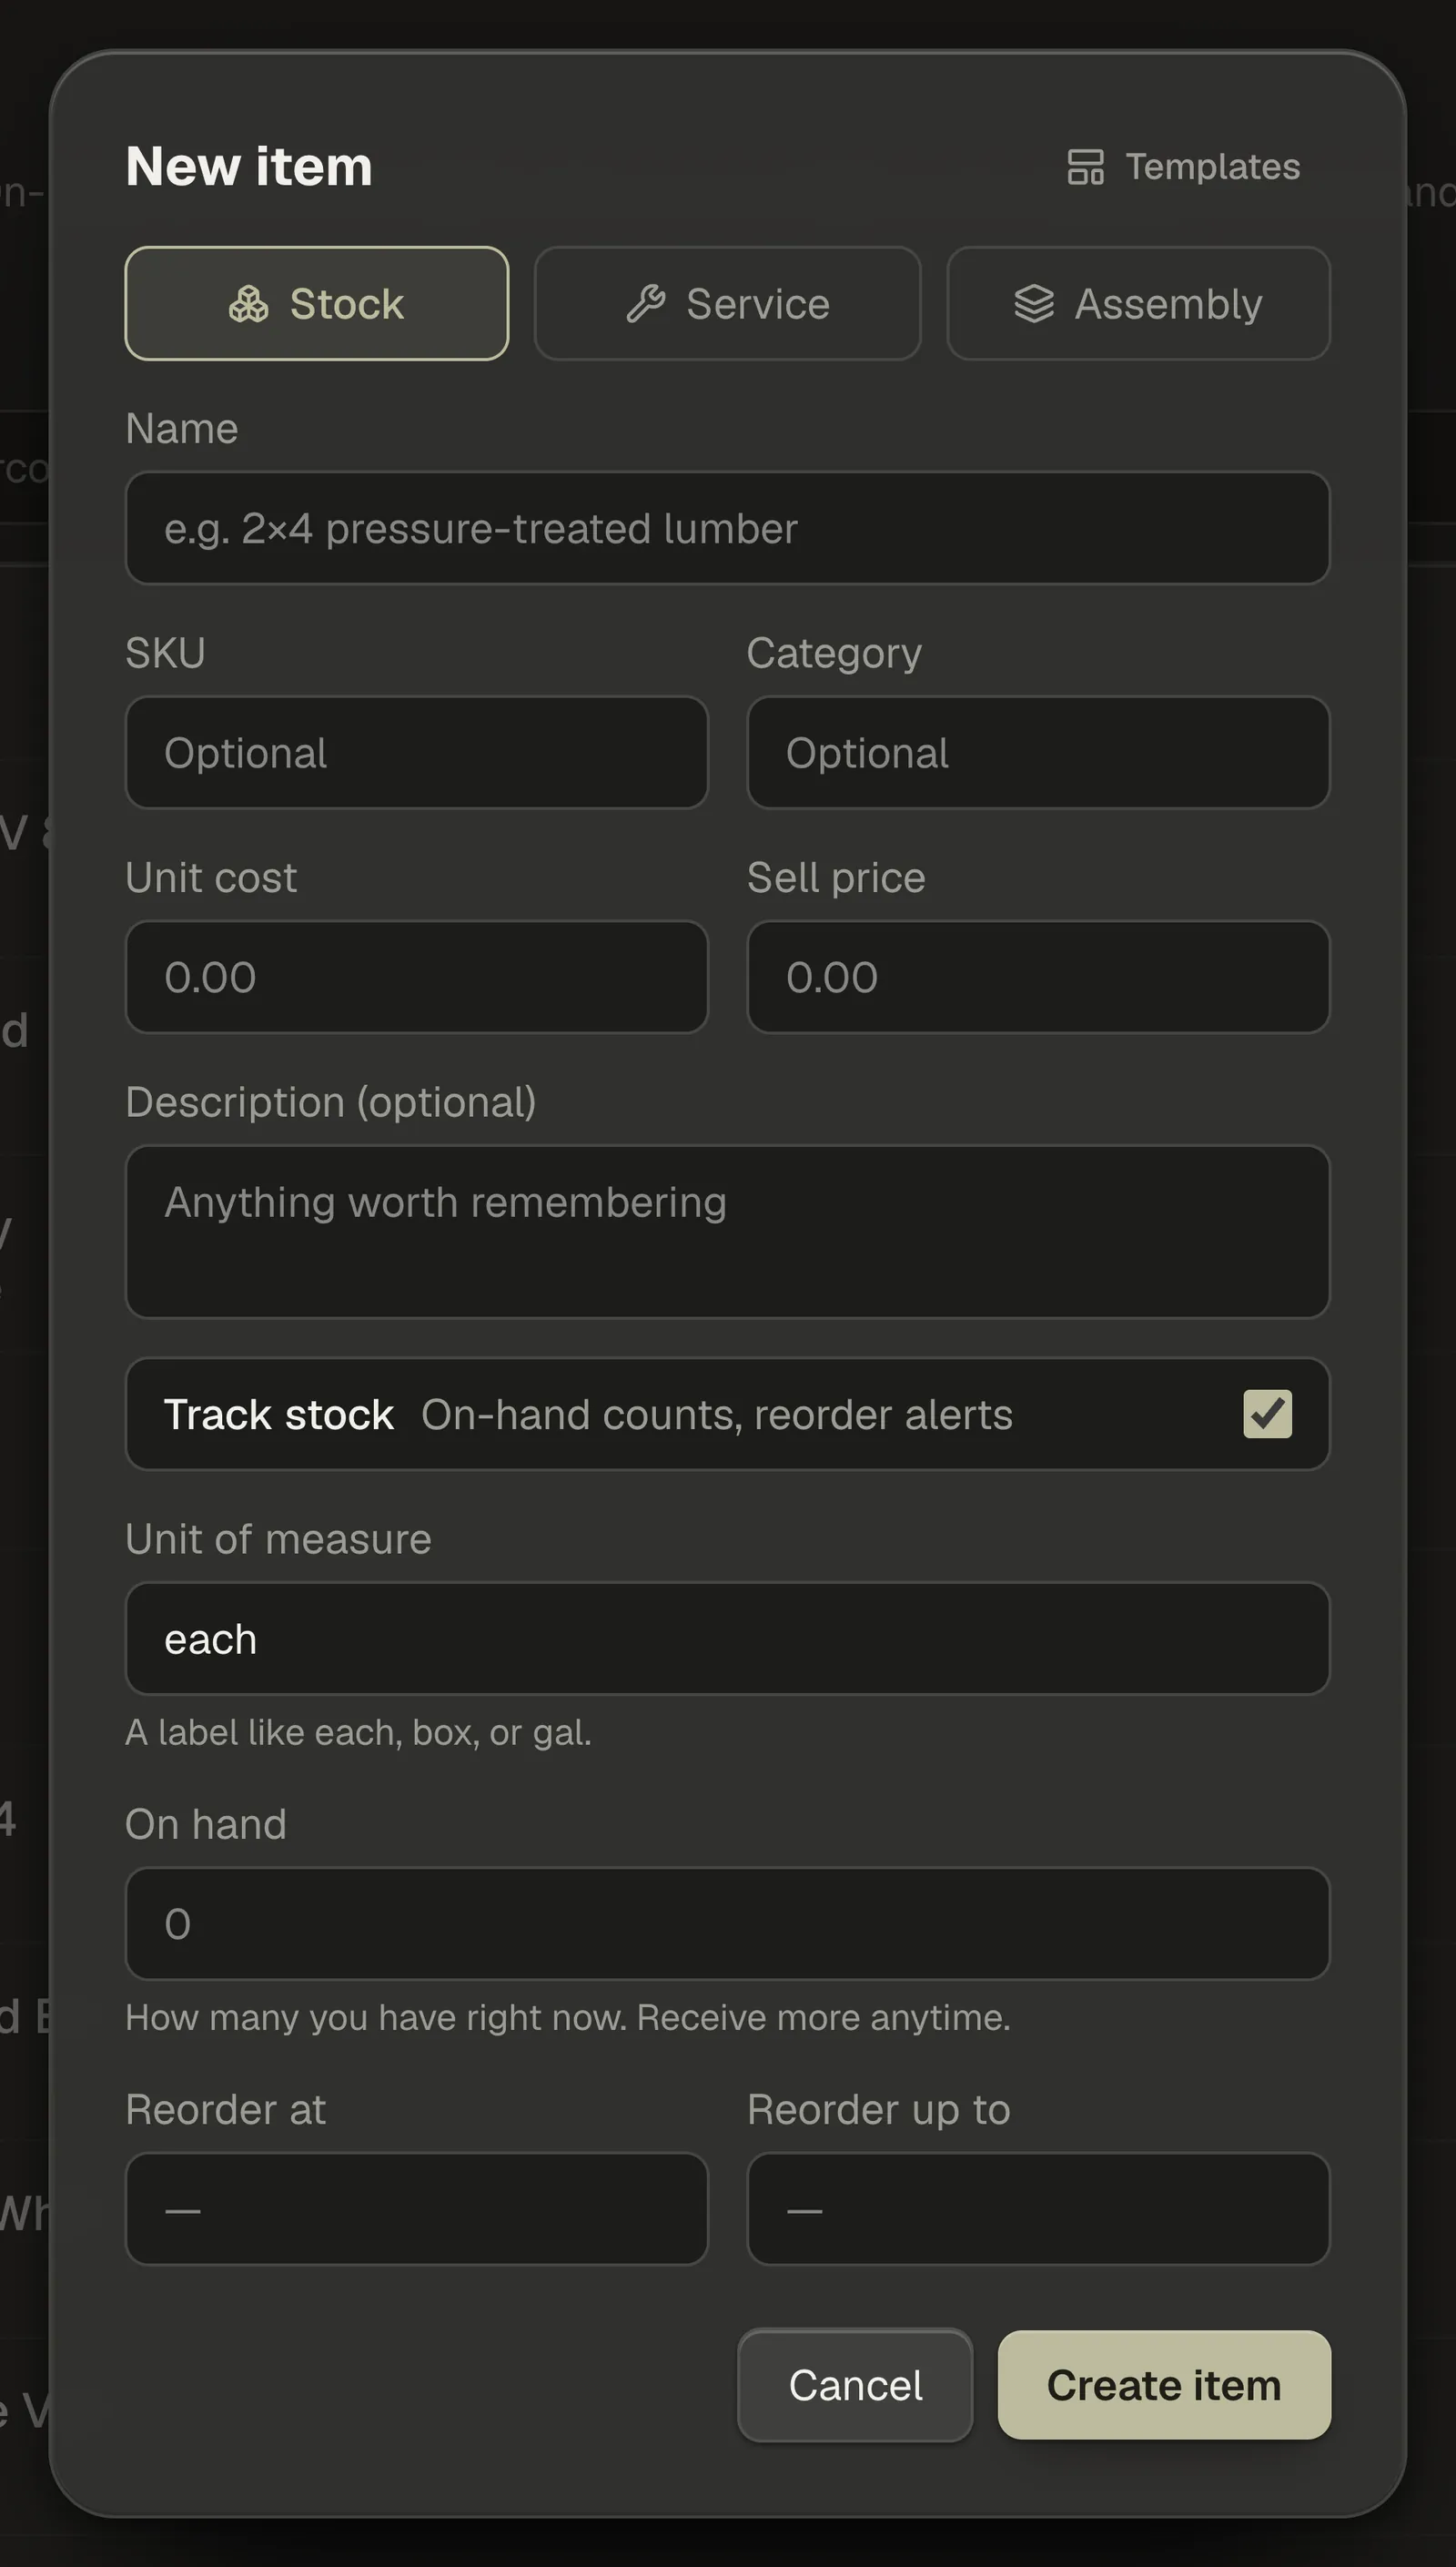
Step 3 — Fill in the item details
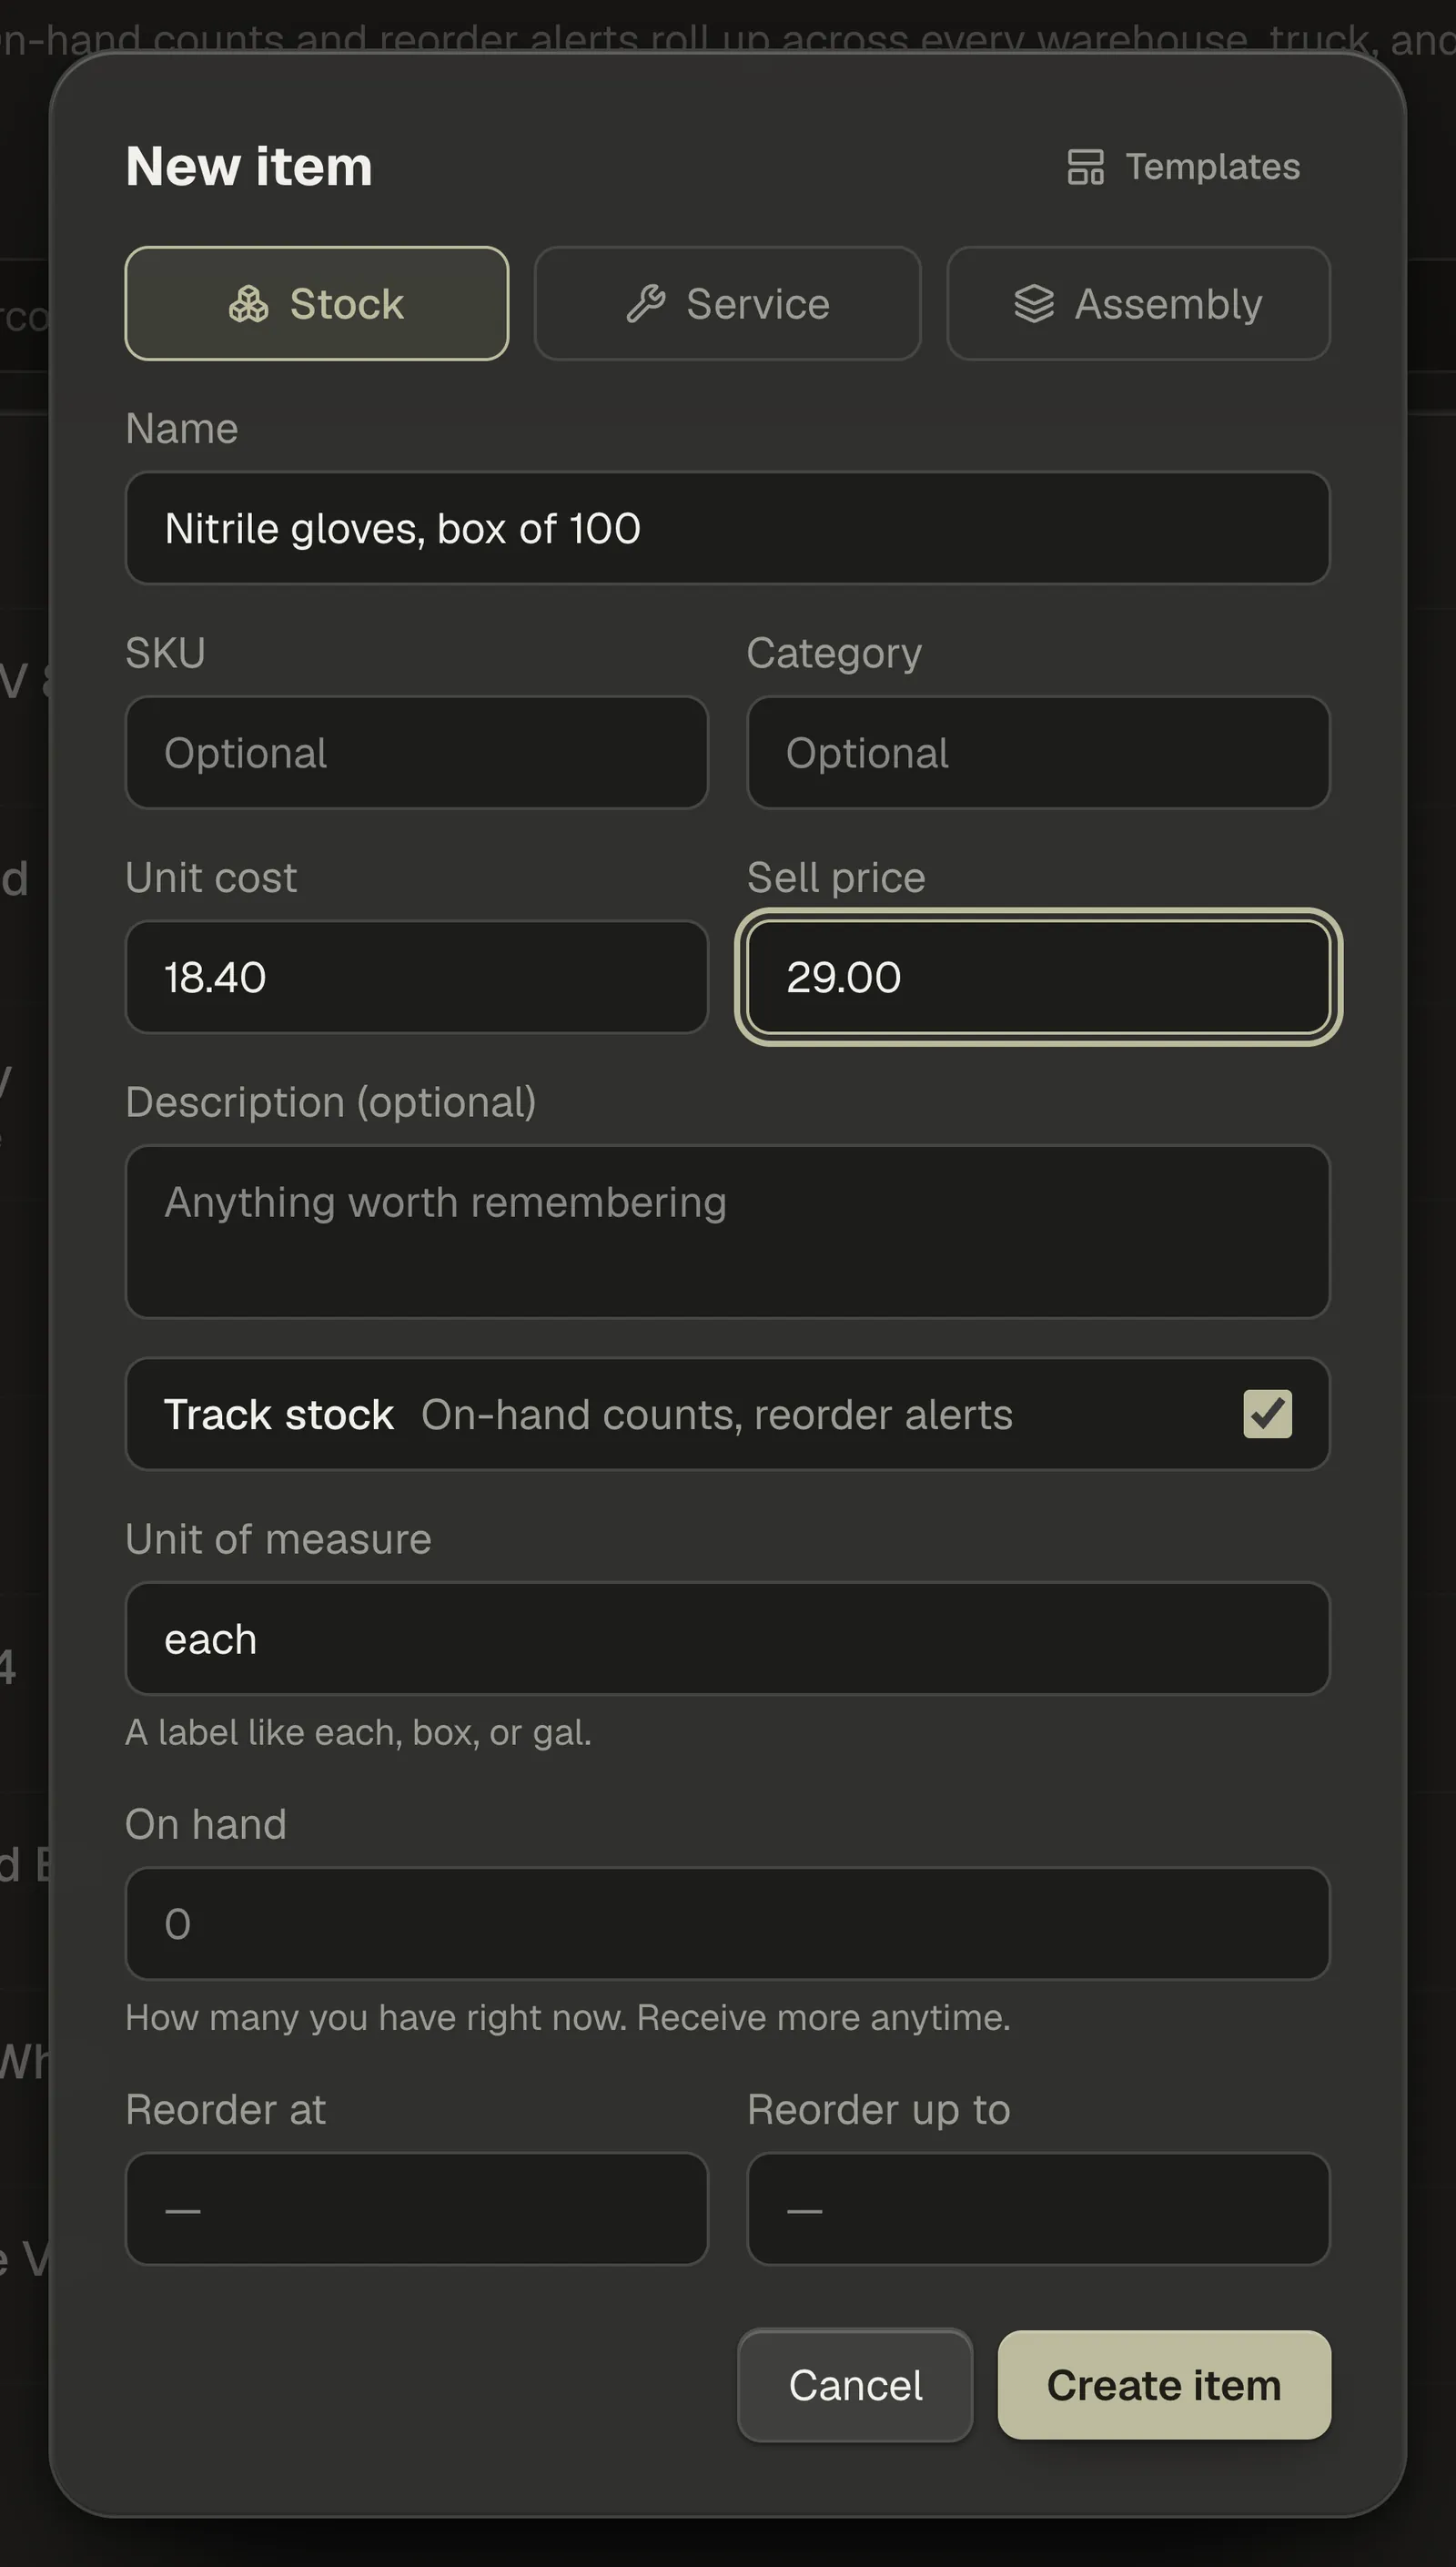
Enter a Name for the item — it's the only field CRMb insists on. SKU and Category are optional, but both are searchable later, so they're worth filling in. Then set the Unit cost (what you pay) and the Sell price (what you charge); either can stay at zero and be updated later.
Description (optional) is there for anything worth remembering. Below it, leave Track stock ticked — it's on by default — so CRMb keeps live on-hand counts for this item.
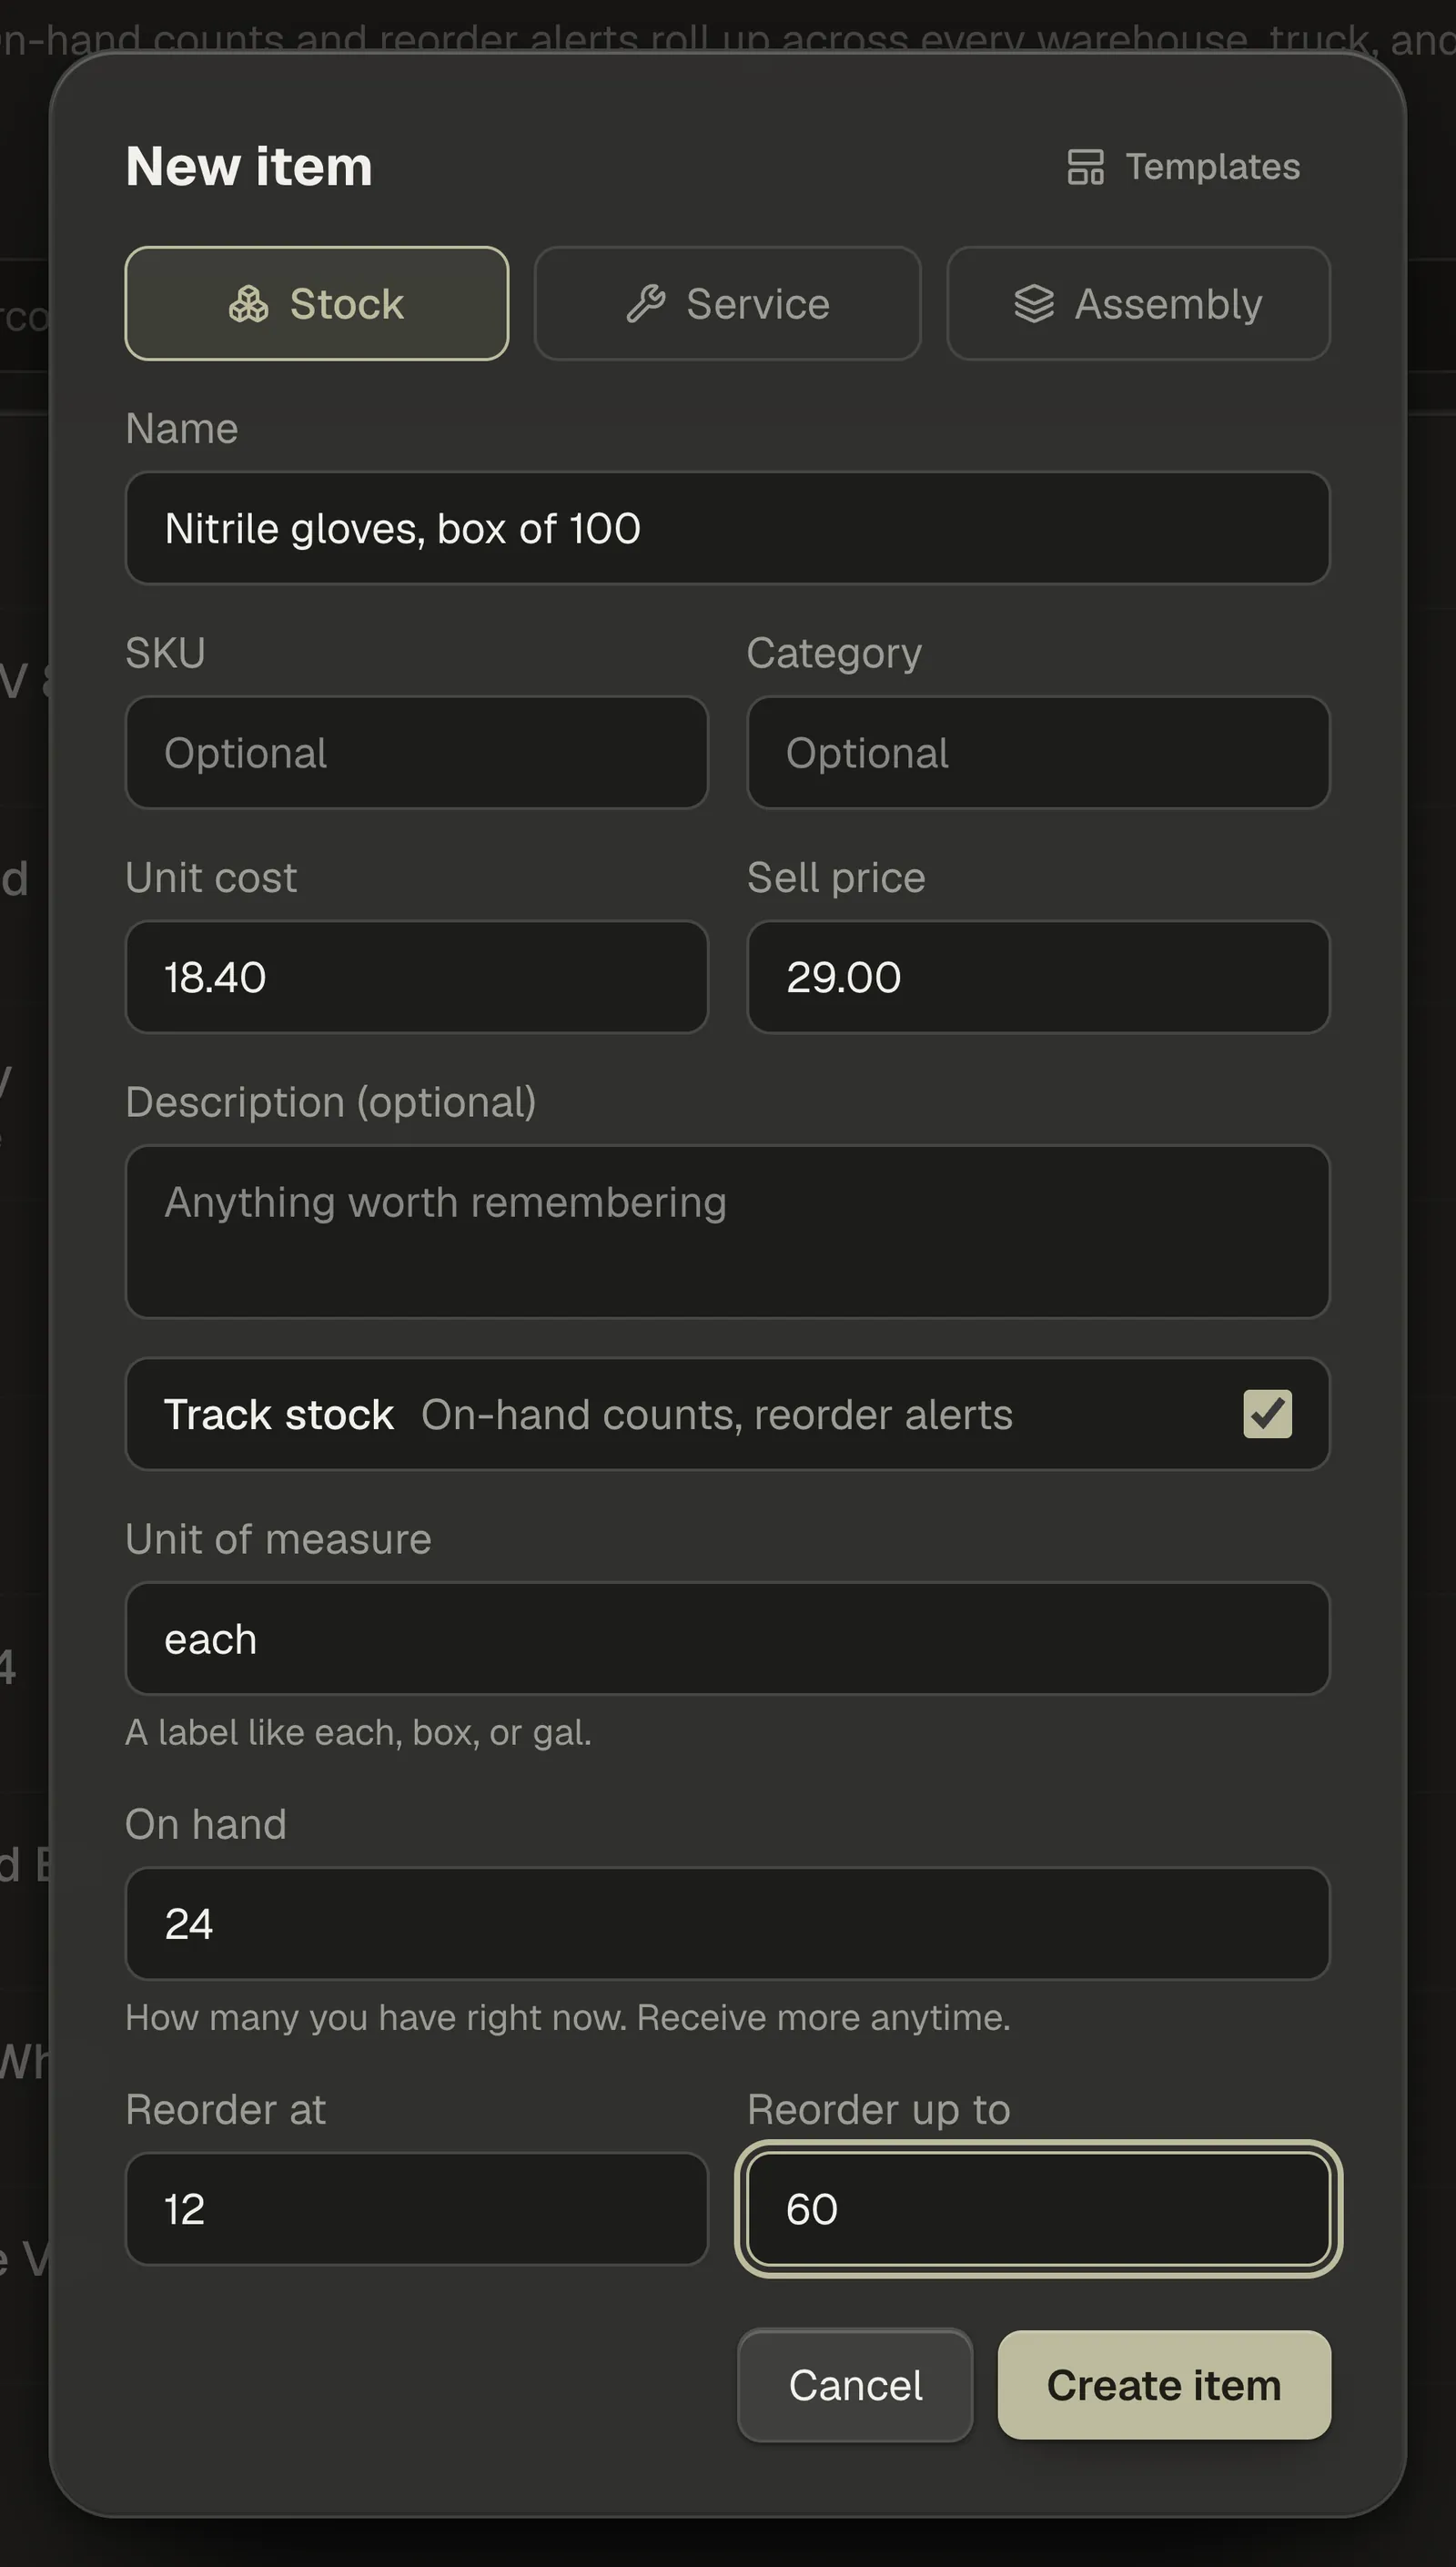
Step 4 — Set the unit of measure and starting stock
With Track stock on, the rest of the stock block appears. Enter a Unit of measure — a label like each, box, or gal — and the quantity you have right now under On hand. You can also set Reorder at and Reorder up to so CRMb flags the item before you run out.
Step 5 — Create the item
When the form looks right, click Create item.
Create item saves the item, closes the window and clears the form so you can enter the next one. The new item shows up in your list straight away — click into it to see its detail page.
Note — If you enter a starting On hand and have no locations yet, CRMb sets up a warehouse called Main for you and receives the stock into it.
Step 6 — Check the new item
Along the top of the item you get Edit, Receive, Adjust, and Count — plus Transfer once you have more than one location. These are owner and manager actions, and they only appear on items you track stock for. If Receive, Adjust and Count are missing, you have no locations yet: add one under Locations on the Inventory page, or enter a starting On hand when you create an item and CRMb sets up a warehouse called Main for you.
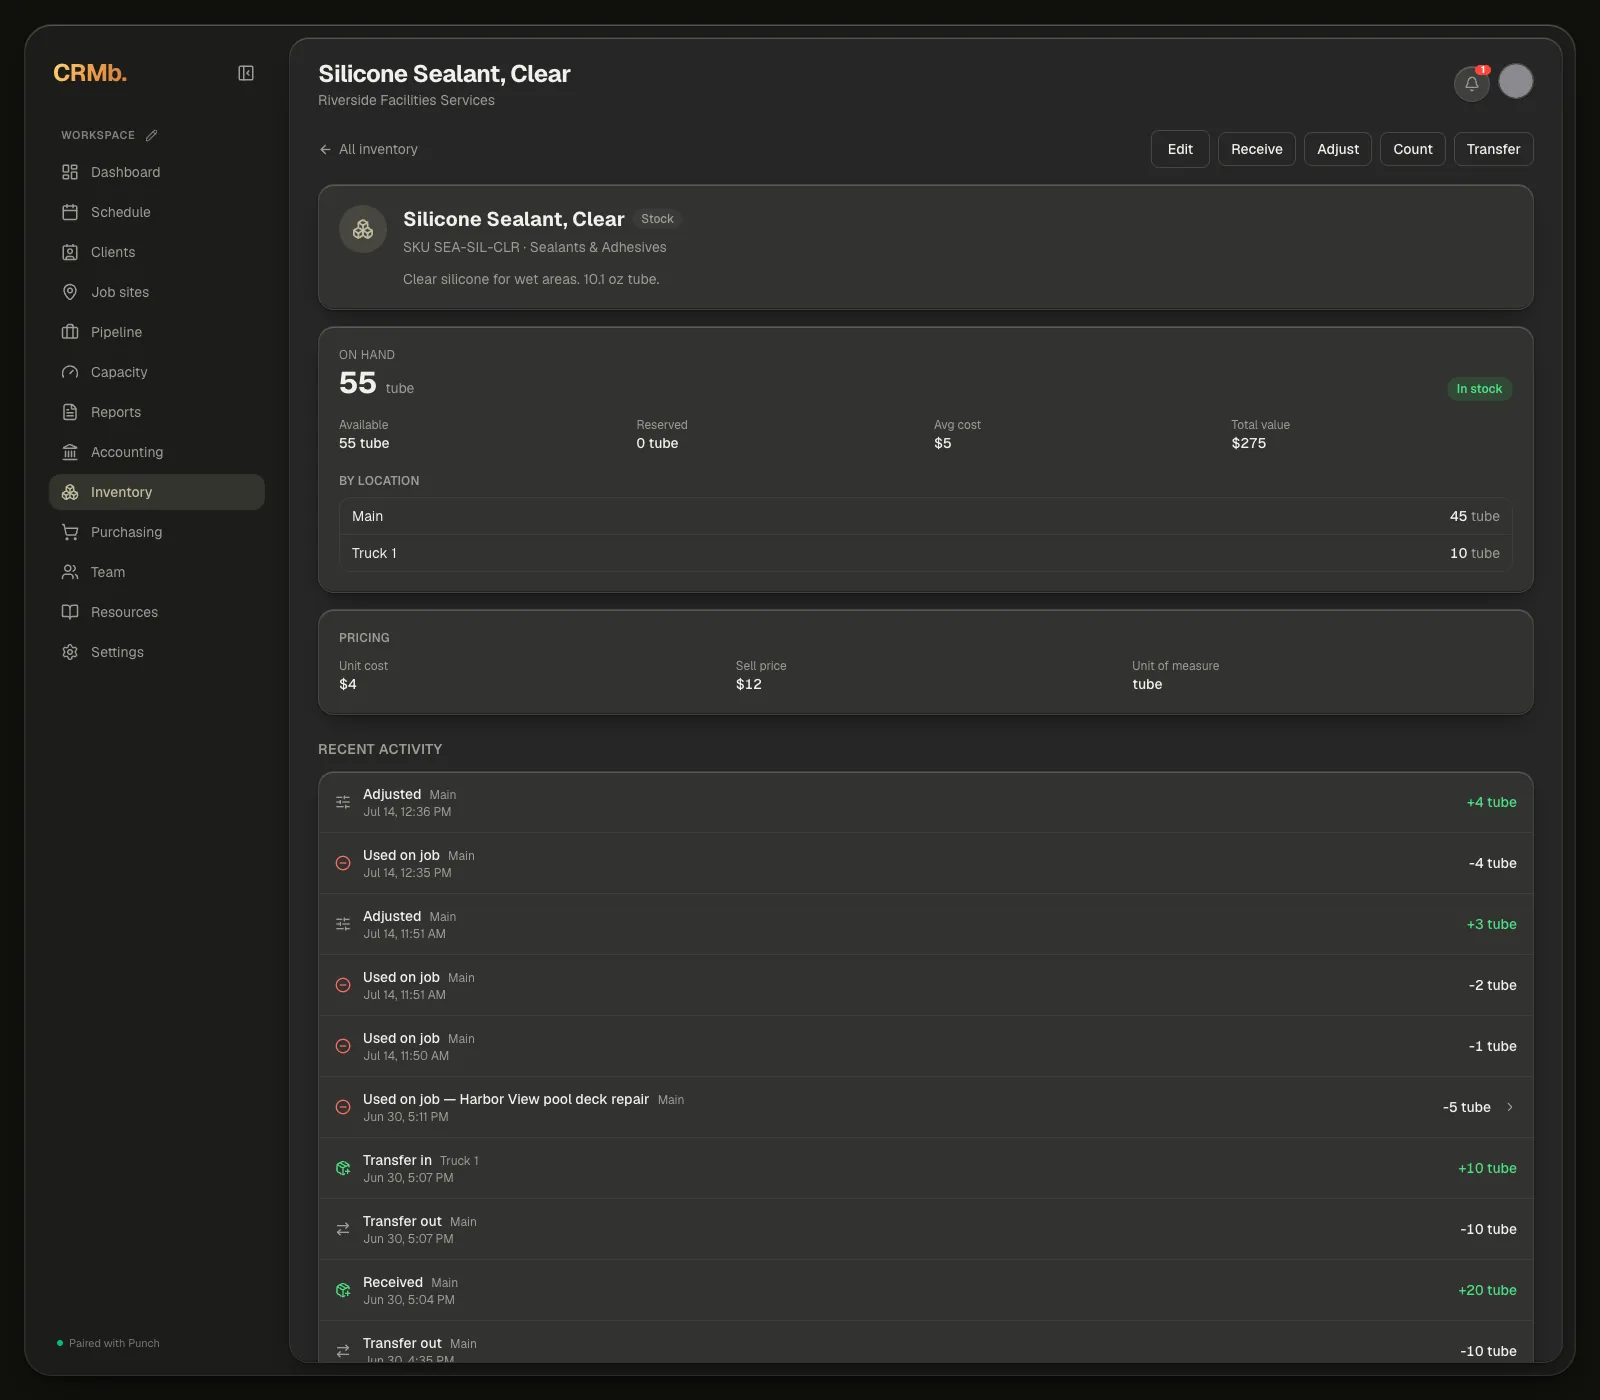
- On hand — the count in large type, and under it four figures: Available, Reserved, Avg cost, and Total value. If you keep stock in more than one place, a By location list follows.
- Pricing — unit cost, sell price and unit of measure, as you entered them.
- Recent activity — the last 25 movements, newest first: Received, Used on job, Adjusted, Counted, Transfer in, Transfer out. It only shows on items you track stock for.
That's it — your new item is live in Inventory, ready to be received, adjusted, counted and transferred between locations. An item you no longer carry can be archived from its Edit window, and archived items come back from Show archived at the foot of the Inventory page.